Introduction
- description, how-to, article
- custom elements, canvas, es6
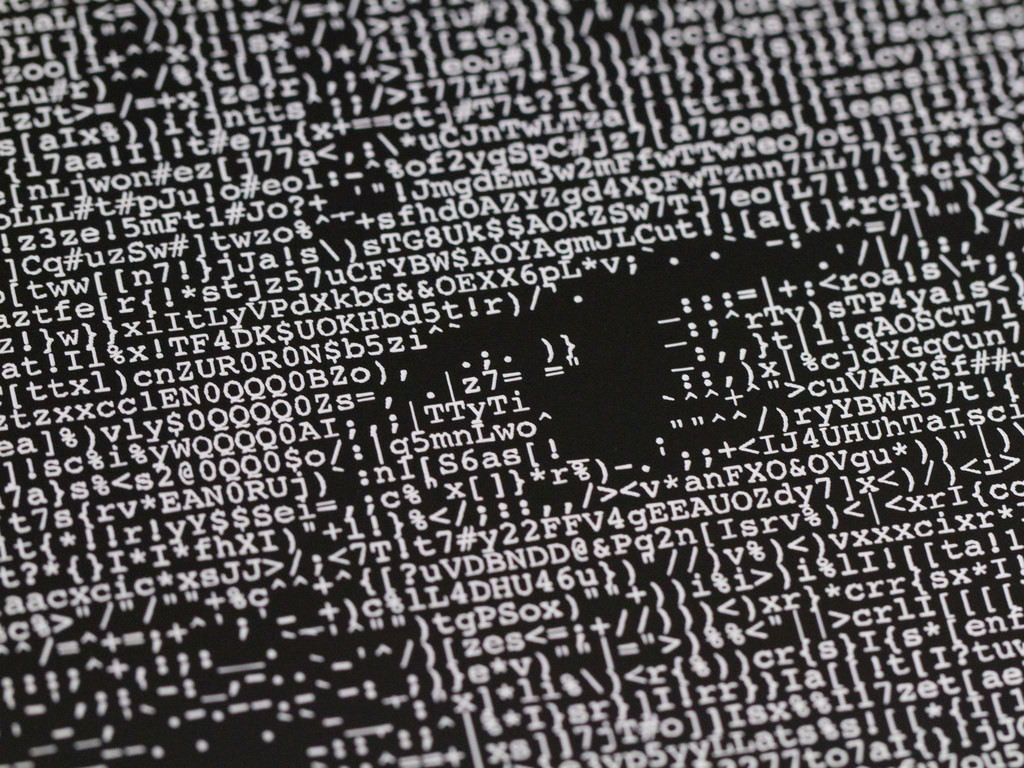
This article is a how-to for some of those out there old enough to remember the heyday of BBS’es and MUDs. I was always fascinated by the talent of the folks good enough to make ASCII art that looked like real images. I decided to create an algorithm that would convert a real image into its ASCII representation. There should be some little tidbits of code that you might enjoy, even if you’re not a fan of the early internet.
Background
- history
- bbs door games
- roguelike
- terminal
- compression
- downsampling
- generateCharacters
- populates the character array with { character, average: { lightness, r, g, b, a }} objects
- getCharacterAverage
- draws a white character on a black background in a small canvas
- returns this characters’ average lightness from getImageDataAverage
- getImageDataAverage
- returns the average lightness and rgb for imageData
- convertImage
- iterates over a canvas in cell.width by cell.height blocks calling getMatchingCharacter
- returns matching characters array for entire image
- getMatchingCharacter
- returns a character that matches this imageData block lightness
- based on the lightness for each pixel, output ASCII characters that have a matching lightness value
- calculate character lightness, find matching character for each pixel
Lightness is how bright a white character will appear on a black background. For example, the character “#” appears to be much brighter than “:”.
You can experiment with changing the character constants in the code to output different effects. I got particularly interesting results when I reversed the order of the output characters to get a “negative” effect.
Using the code
I’ve documented the code in the solution, but I will include my favorite method here for review. This method is the third type of ASCII art (mentioned above). It will take a posted file (via HTTP), read the pixels in, get the grayscale value of each pixel, then find the appropriate ASCII character to output.
//% highlight javascript linenos %}
// % endhighlight %}
In a nutshell, we’re doing the following:
- Convert the Image object into a Bitmap object
- Enclose the output in HTML paragraph tags
- Loop through each pixel in the bitmap, and obtain the color
- Strip the color information from the pixel (see below)
- Find the character to use based on the new shade (see below)
- Aggregate all of the characters, then return the HTML
Converting to pixels to lightness values
The simplest way to get a lightness value is by averaging all of the pixels’ rgb components.
Converting lightness values to characters
In order to convert the lightness value to a character, we average blocks of pixels cell.width by cell.height and find a character in the array with a matching value. The values I’ve included with the demo code seem to work fairly well, but feel free to experiment with different character sets.
You can use as few or as many constants as you like. 9 seemed to provide good results. The constant values that I chose are are as follows:
function getCharacterLightness(character) {
  // clear canvas (black)
  ctx.fillStyle = "#000";
  ctx.fillRect(0, 0, cell.width, cell.height);

  // draw the character (white)
  ctx.fillStyle = "#FFF";
  ctx.fillText(character, 0, cell.height / 2);

  let data = ctx.getImageData(0, 0, cell.width, cell.height).data, avg = 0;

  // running average of lightness for this imageData block
  for (let i = 0; i < data.length; i += 4) {
    let lightness = (data[i] + data[i+1] + data[i+2]) / 3;
    avg += lightness;
  }

  avg /= (data.length / 4);
  return Math.round(Math.min(avg*8, 255));
}
So now, as we get the gray shade for each pixel, we just output the corresponding ASCII character. The logo of my favorite team (Denver Broncos) now appears as follows:
Points of interest
Many of you will notice that I did not use an HTML Text Writer to build the HTML. Simply put, it was more overhead than I needed. StringBuilder seemed to work very well, and though it doesn’t afford me the luxury of ensuring I have the right formatting, it is by far the fastest solution.
Styling is handled by a CSS file (included). For this reason, the “class=’ascii_art’” bit was added to the opening paragraph tag. You may notice that the VS2005 IDE flags the “line-spacing” attribute in the CSS designer. Don’t worry… both IE and Firefox know how to handle it. Line spacing keeps the characters close so there is not a lot of whitespace between the lines. Also, it is important to use a MONOTYPE font (Lucida Console, Courier New, Terminal, etc.) for the font, otherwise your image will be extremely skewed.
Currently, the solution just performs a Response.Write() of the HTML to the Default.aspx page on postback. This could obviously be modified to post to a separate page, but I chose not to for purposes of simplicity and illustration.
Happy ASCII’ing!